This month’s DIY was inspired by a post by The Armchair Sommelier; if you haven’t read her blog you simply must check it out.
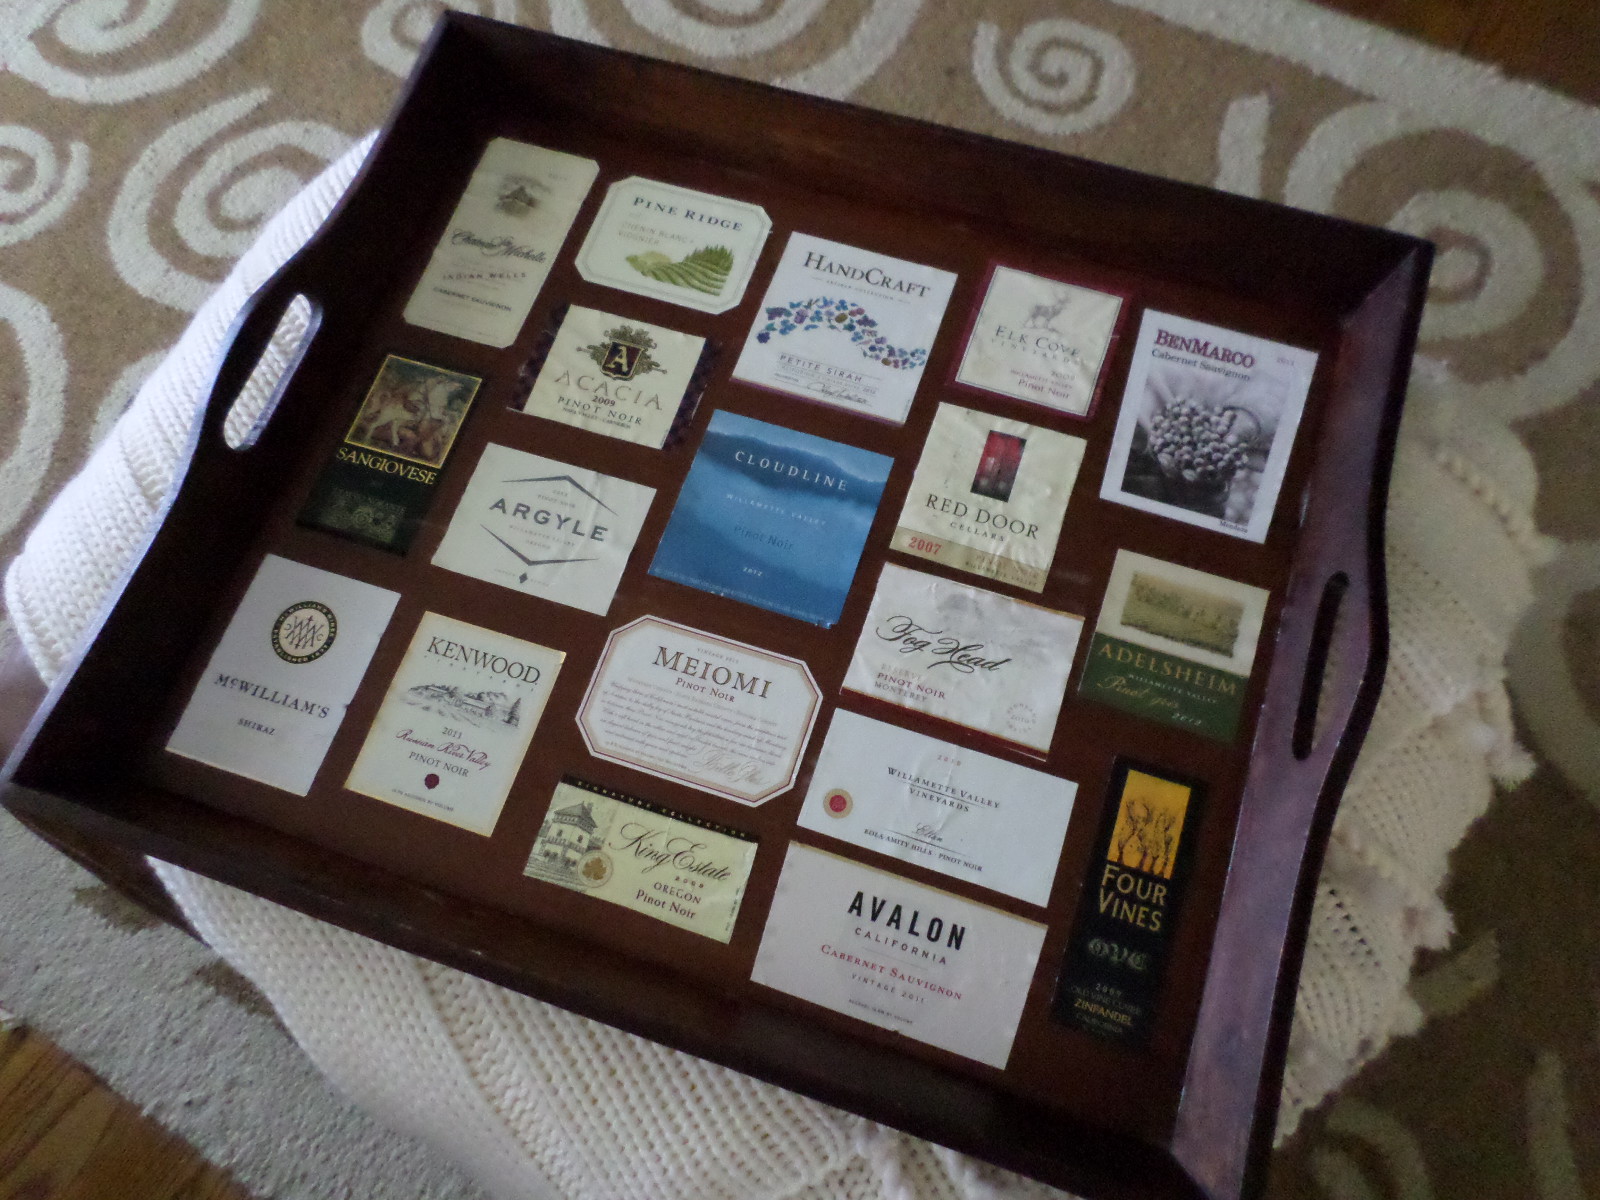
Transformed! A few wine labels, some Mod Podge, and my friend you have yourself a nifty little tray.
Materials:
several dozen wine labels (more on how to remove them later)
1 bottle of Mod Podge (I used matte)
1 inch sponge applicator(s)
1 damp sponge
display medium (mat board, foam core, stretched canvas, wooden tray…you can be very creative here)
This is not a project to do in a hurry. First of all, there is a lot of wine to drink. I know that doesn’t sound like much of a challenge (or maybe it does…who knows) but it takes a while to accumulate 25 – 30 labels, so this may be a good time to throw a party. Also, you will need a method by which to remove the label and then a method in which to store them.
There are two main ways to remove a label from a wine bottle: the oven method and the soaking method. I much prefer the oven method as the label comes off in one piece, usually pretty easily, and it holds it’s shape better upon reapplication. The soaking method makes the label soft and prone to tearing. Even with Mod Podge a soft tissue-y label is a pain.

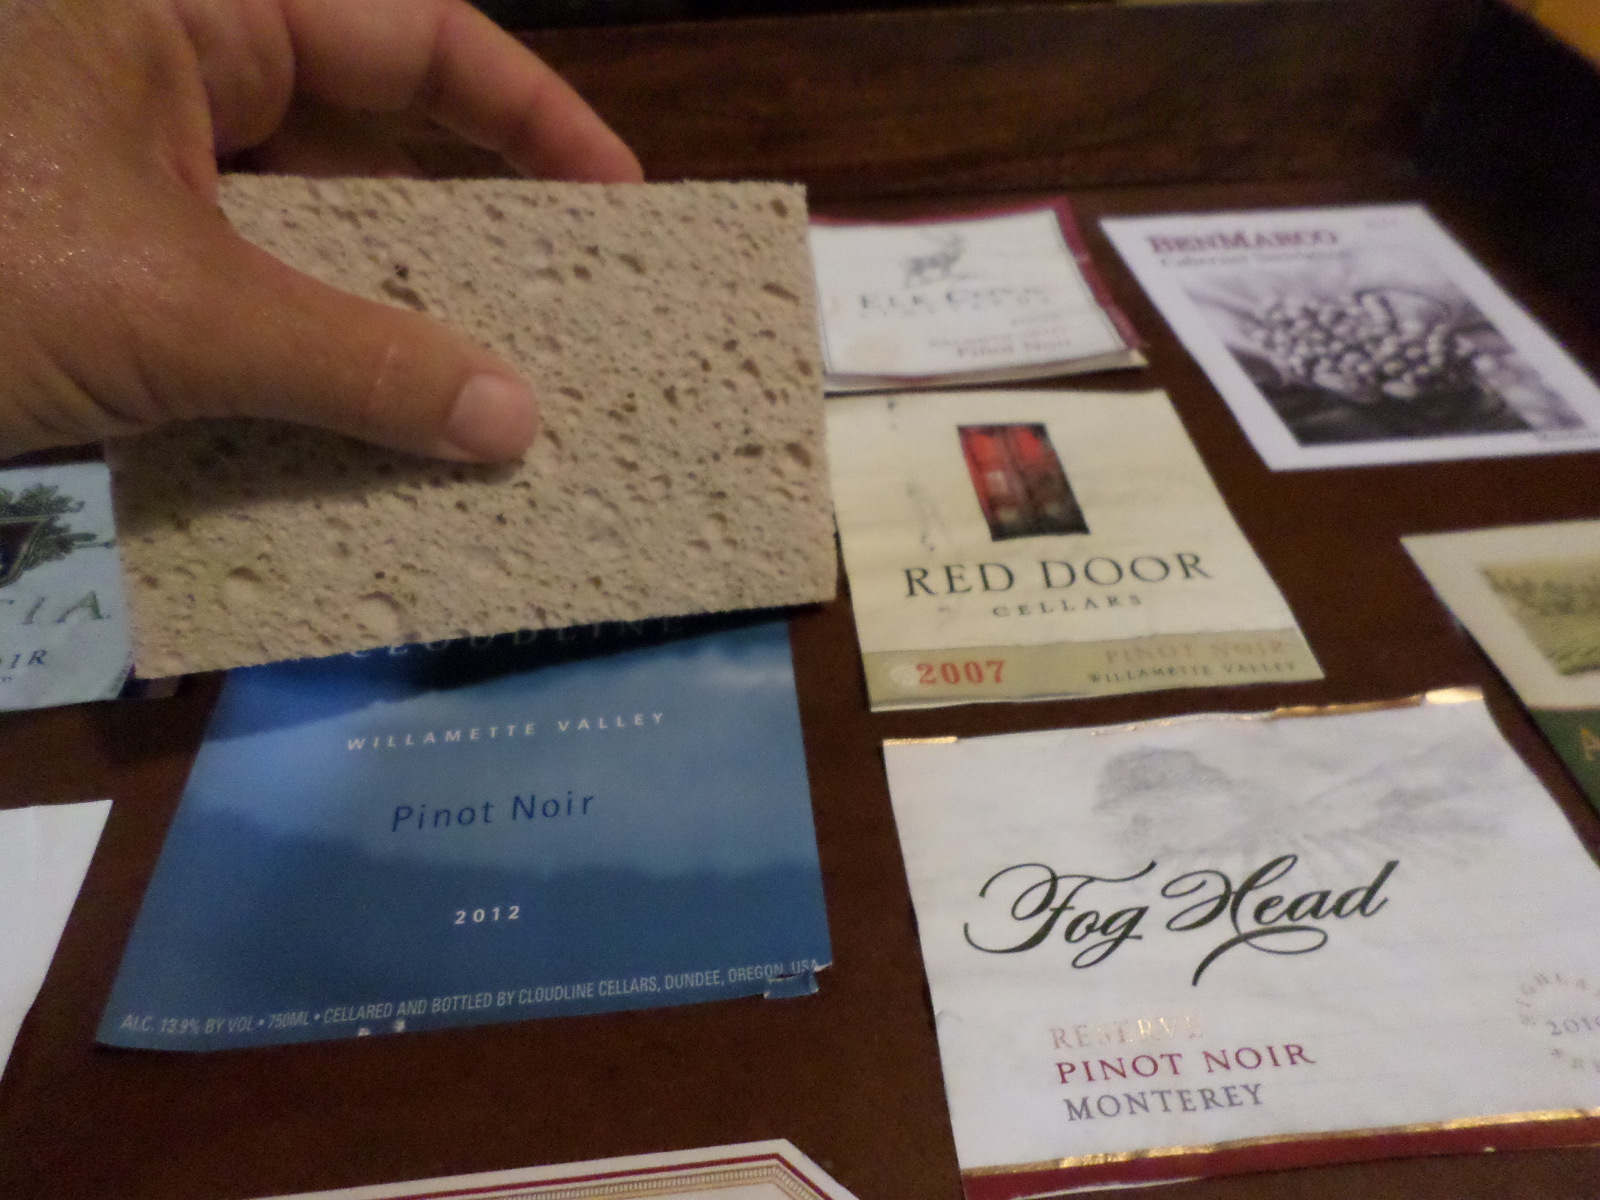
Since the labels are a little sticky when they come off the bottle place them on waxed paper to keep them neat while you store them.
I recommend pressing your labels between a couple of books as you accumulate them as this will make them a little easier to work with when it is time to begin gluing.
Step 1: Arrange the labels on the medium and adhere with a little Mod Podge. Use a damp sponge to wipe off any globs of Mod Podge as they can look cloudy when dry.
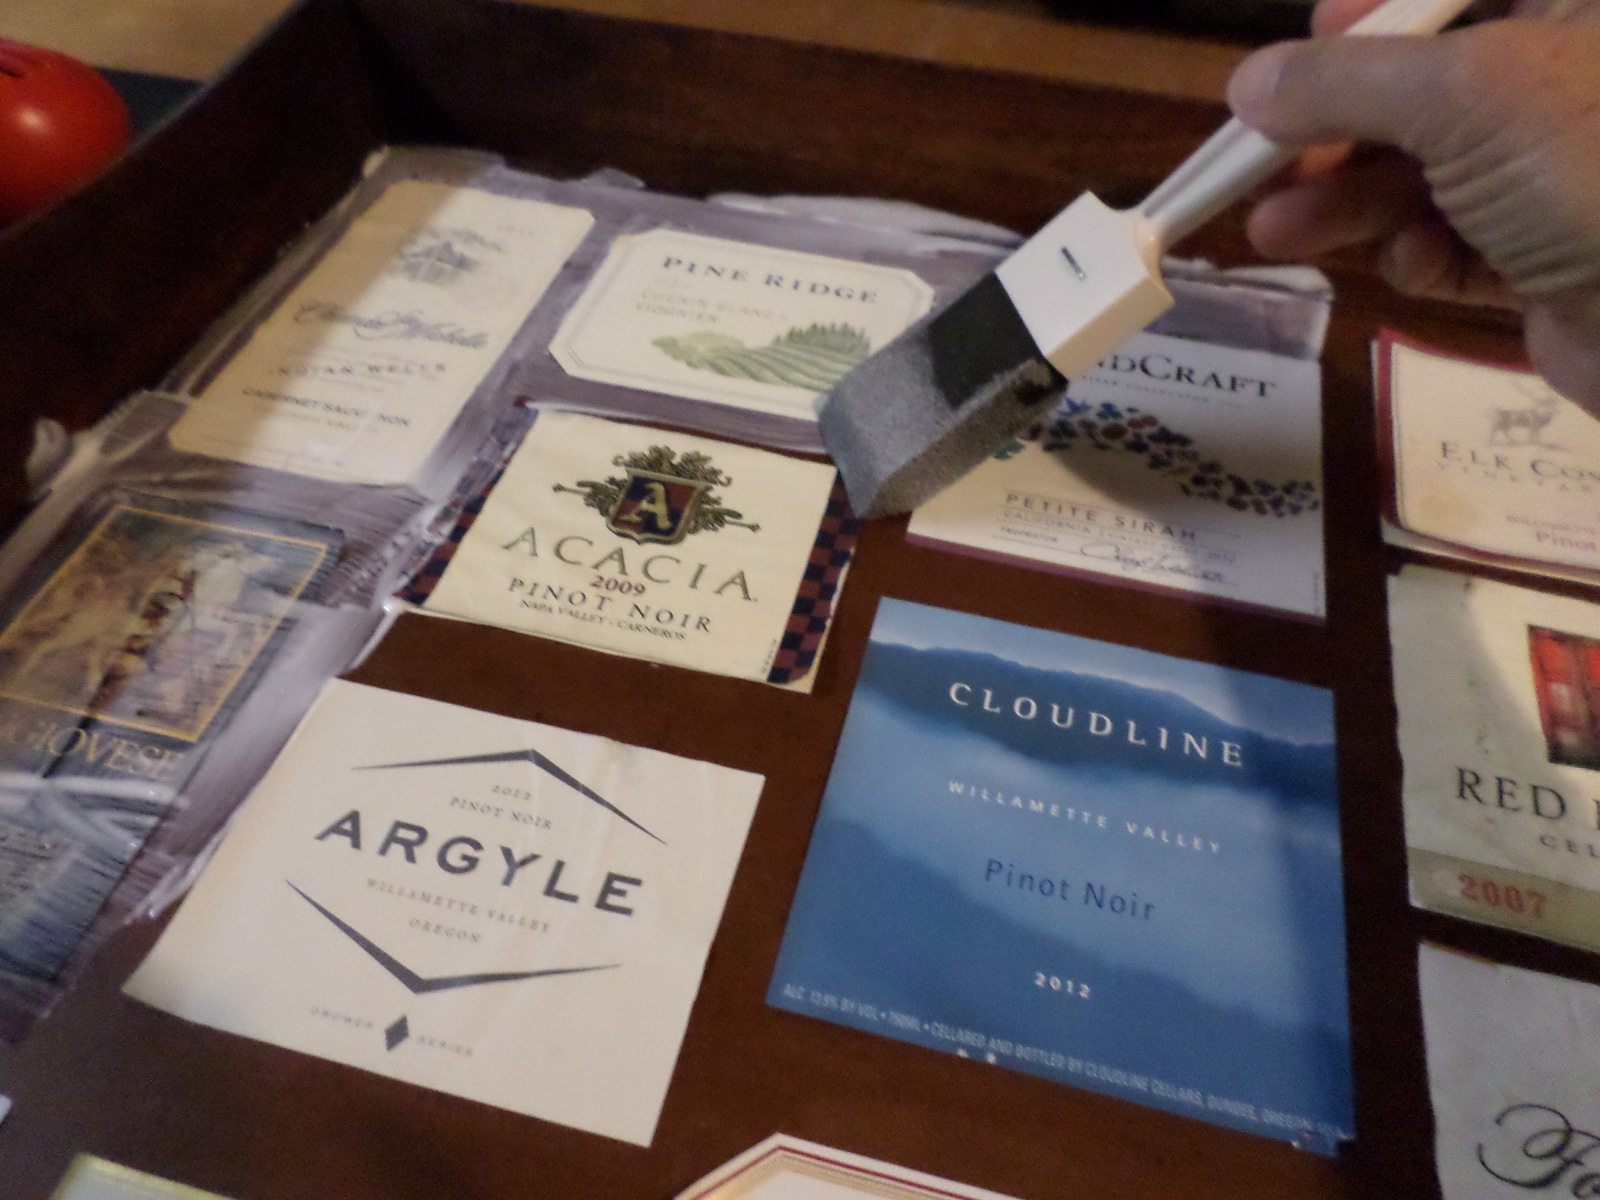
Step 2: After sufficient drying time, begin to coat the entire surface with Mod Podge. I know you’ve heard it a kajillion times but several light coats are better than a few heavy gloppy ones.

Step 3: It takes several coats of Mod Podge to really get a nice smooth adhesion. Give yourself a few days to accomplish this and allow enough drying time between applications.
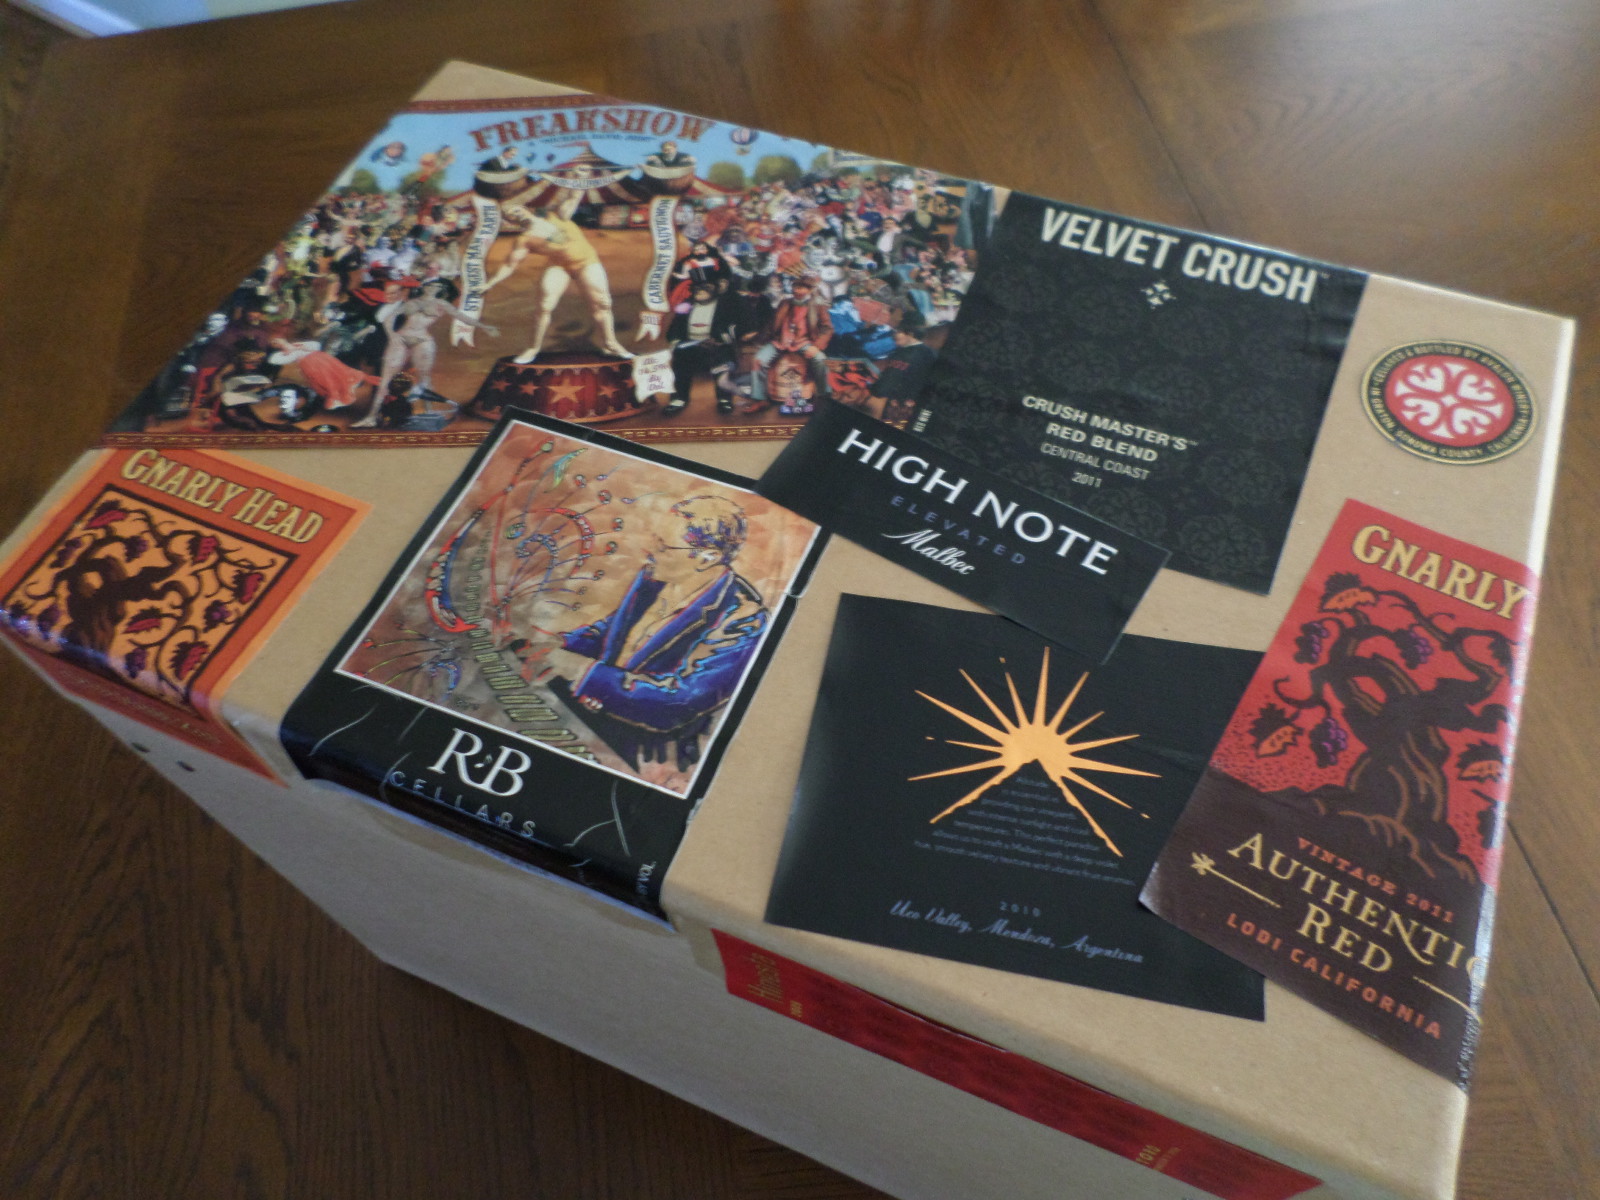
Bonus: I had several black and red labels left over that I used to apply to the lid of a file storage box. Not my best arrangement ever, but they do look kind of neat (that Freakshow label is awesome).
I used my beloved Willamette Valley Pinot Noir labels in the center of the tray, and then favorites along the outside to fill it in. I don’t really love Four Vines OCV Zinfandel but my gosh how great does that label look in the lower right corner? Since I’m using my tray on top of an ottoman, I cut a piece of clear acrylic (from Lowe’s) and put it over the labels and presto! Instant coffee table.
Cheers!

I 💜 your tray, Kirsten!! What a great project. And thanks so much for the shout-out!! Salud!
The seed you planted has finally sprouted. Thanks for the follow 🙂